Stud Walls are an easy and common way to divide internal areas in residents and commercial buildings. They are great for hiding electrical cables, easily accessible and repaired.
Preparation To build a stud walL
Building an Internal Stud Wall is relatively straightforward and achievable even if you have limited DIY experience. However it does require some preparation. An important consideration is Building Regulations. Ensure that any work you do conforms to the latest regulations, or you’ll be falling foul of the law. Just make sure to consider the fire resistance, ventilation and light, and you’ll be fine.
What tools are required to build a stud wall?
The tools required to build a stud wall are a saw, a hammer, a nail gun, a spirit level, a pencil, a workbench, a square, a large filler knife and a plumb line. You’ll also need plasterboard, studwork timber, 100mm nails, jointing tape, a sharp knife, and a jointing compound.
Preparing for the wall
The stud wall comprises of a frame of timber which is secured to the floor, wall and ceilings. This frame will be coved with the plasterboard. When you’re finished with it and have decorated it the way you want, it’ll look just like a normal wall and a part of the home.
There are four areas to consider when building the frame; the ceiling plate, the floor/sole plate, the vertical studs, and the horizontal braces.
The ceiling plate: This is fixed to the ceiling
The floor/sole plate: This is fixed to the floor
Vertical studs: These are equally spaced and stand vertically, connecting the ceiling plate to the floor plate
Horizontal braces: These provide extra support to the stud wall, keeping the frame rigid. They’re fixed between the vertical studs.
How to Build a Stud wall
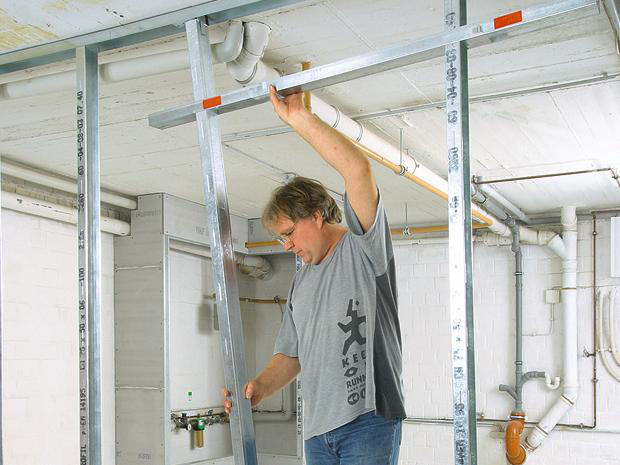
When building a stud wall, firstly measure the area up and mark the measurement on the skirting board. Next, make sure that the area you’re building in has no pipes or cables that you’ll accidentally hammer in to.
Hang a plumb line – usually a piece of string with a weight attached suspended form the ceiling – by the markings, so that you can mark the vertical lines from the ceiling. Mark where the wall junction will be by banging a nail into ceiling, doing the same to the opposite wall, joining these together with another line in pencil.
Measure the length of timber that you’ll need for the ceiling and cut it to size, and then screw it in to place with cross head wooden nails – you could crack the plasterboard using traditional nails.
With the ceiling plate attached, do the exact same again with the floor plate, measuring your timber and screwing in the timber and plasterboard.
With the ceiling and floor plates in position, it’s time to put the vertical structure in to place. To do this, measure the distance between the ceiling and the floor and fix two vertical lengths of timber in place. At this point, you may need to cut the timber to fit around your skirting board.
Use vertical studs to connect the ceiling and the floor plates, then fit the noggins – the horizontal support – by cutting timber lengths to size between the vertical lengths.
Fitting pipes and cables in a stud wall
Once the timber structure is up, make it suitable for either plumbing or electrics, or both, depending on the needs of the room. For pipes, mark the timber studs use a chisel and mallet to carve out access points. For cables, you just need to drill holes in the wood for them to slot through. If you’re making space for both pipes and cables, make sure they won’t be going in the same hole and are completely separate from each other.
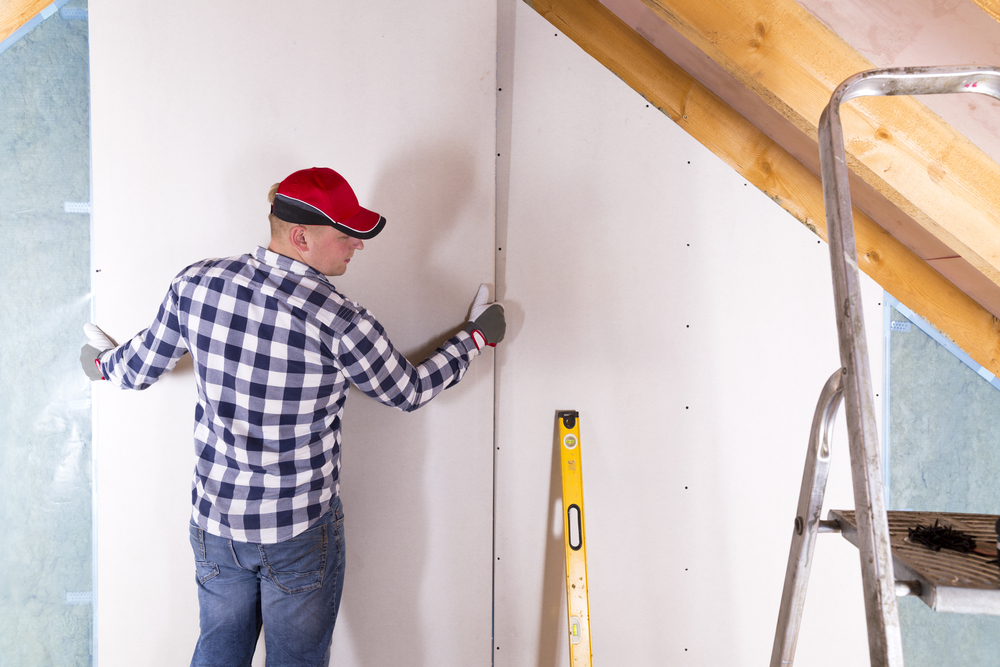
Fixing the plasterboard
Now that you’re done with the plumbing and electrics, it’s time to finish up with the plasterboard. This step would work best with two people, so that someone can hold it in place whilst the other fixes it in to position. Ensure that you keep the ivory paper side facing outwards, as this is the side that can be decorated. This is likely the most straightforward part of the whole process, and you shouldn’t run in to any problems; just remember to nail 32mm plasterboard nails or use suitable drywall screws at 150mm intervals. Once the boards are up you can tape the joints, fill including all the screw holes, rub down and paint or, if you prefer, skim coat and paint.#
With all of these steps followed, you should now know how to build a stud wall!
V Cut
If you’re looking to build a stud wall, then you need the best quality plasterboard for the job. At V Cut, we supply plasterboard for a range of uses, from flexiboard, LED lights, to stud walls. Have a browse of our full product range here, and for pricing information and any other enquiries, please don’t hesitate to get in touch with our team, who will be happy to help.