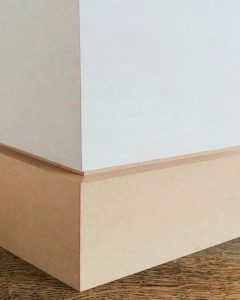
How to fit skirting boards

Skirting boards are an essential part of any home. They cover up the joint between the floor and the wall with a decorative border, whilst covering up the gaps which are needed for the natural contraction and expansions which occur in a house – as well as protecting it from getting hit by the hoover and other household items. They also take a lot of wear, but thankfully they aren’t too tricky to replace by yourself, and you have a lot of choice when it comes to the wood used and the look of the end product. But how to you fit skirting boards?
Initial preparation
You’ve got a relatively straightforward job at hand when it comes to fixing this skirting board by yourself. If you’re in a square room, simply choose the wall straight in front of you to begin with. Next, make sure that you have the right tools. You’ll need:
- Mitre saw
- Tape measure
- Compass
- Jigsaw
- Coping saw
- Nail gun
- Pencil
- Wood glue
- Nails, punches, screws and a battery drill.
You may not have all these tools to hand, especially things like the nail gun, but these can easily be hired.
Replacing
The first step is to measure up the areas that you’ll be fitting with skirting board, and allow an extra 20% onto your measurement for contingency. Make sure to clearly mark the board which side will be facing into the room, and which way up you want it.
Fitting the first board
Start with the straight cuts – any pieces which can go in with a square edge cut at both ends. Attaching the board with an instant grab adhesive is by far the most popular way to fix boards, especially in houses with plasterboard walls. Simply apply a decent amount of adhesive to the board, press it firmly against the wall, and wipe away any excess adhesive from the sides. You can also screw the board onto a plasterboard wall; simply mark the mark the position of wooden studs and drill through. If you’re fitting to a solid wall, then mark the wall every 6cm by drilling pilot holes through the board. Fit the board with screws which go at least 3cm in to the wall, and finish with wood filler.
Scribing
The next piece needs to be scribed – cut at a 45 degree angle – so that it fits in with the first piece you fixed. Cut the angle in with your mitre saw, then cut away the edge with the coping saw. Check that this piece fits with the one that’s already attached to the wall, and if you’re happy with the fit, cut the other end and attach it to the wall. Make sure that you’re always fitting a square end to a scribed end; never scribe both ends before fitting.
External Corners
When the boards eventually meet at an external corner, simply use the mitre saw to create a neat 45 degree angle join – make sure that the second piece is cut in the opposite direction. When fitting these external corners, always fit them in pairs so that they fit together, rather than fitting one and then trying to get the other to fit.
Finishing Up
Once you’ve fixed all the skirting pieces, fill any gaps between them and the wall with decorators’ caulk and neatly finish by running a damp finger along the join. Allow it all to dry, and then it’s ready for painting.
V Cut plasterboard
Fitting new skirting board is possible even with limited DIY experience, and with our guide you’re sure to do a job up to professional standards. If you’re looking to renovate a room with plasterboard as well as new skirting boards, then take a look at our product range to see what we have on offer. If you’d like any help or more information on our guide to skirting boards or on any of our products and services, please don’t hesitate to get in touch with our experienced, friendly team, who will be happy to help.
